23 October, 2015

My version of the Shingle Dress: Vogue 8904

Every now and again, there comes along a pattern that catches fire and takes everyone's fancy.  This is one of them.


 Seemingly a very simple shift knit dress, it's made unique by those newfangled, off-to-starboard-off-to-port angled panels over the front and (hooray!) back.  Like the Bluenose ploughing through a sou'easter with handsome Captain Angus Walters at her helm.


With this one, Marcy Tilton hit it way, way out of the park.

Once again I applaud the great resource that is Pattern Review.  When I started to think of making this dress, I took a nice long look at the versions already posted there - at last count, 52 reviews. All made within two years of the pattern's release.  They allowed me to look at very many versions and ponder at my leisure what it was that I liked, and why, and how, I liked it. Quite the luxury. 


I decided what I wanted: 
- knee length: not mid-thigh nor mid-calf 
- stripes - oh yes those stripes - the shingles shine at their best when those stripes make your eyes go all dizzy with their moiré
- all five panels, on a knee length dress; the pattern uses four panels on an above-the-knee length and five on a midi
- all shingle stripes, including the bottom one, oriented (more or less) horizontally
- each panel ending on a dark stripe
- long sleeves, cut so the stripes run vertically
- widened shoulders on the dress

Taking my desire to fit all five panels into my shorter than standard shoulder to knee height, I began by shortening the underdress pattern piece by about 2 cm in the middle of each "shingle", and then shortening each shingle to match.  I then asked my fashion designer mom - she's a wicked seamstress with a  mouthful of pins! - to pin-fit the sides and to take out a horizontal fisheye dart just above my behind to remove any back waist puddling.


 Getting each pair of front and back  panels to match exactly seemed to take forever.  This seemingly easy peasy quick little frock is anything but.  Everything seemed to take forever:  like ensuring all panels were symmetrically spaced;  finishing/hemming and aligning each front and back panel pair - and then, matching all these damned little stripes along the side seams. Agony and arrrgh! I pinned said seams till they looked like line-dancing hedgehogs; machine basted, checked, ripped, repinned, rebasted,  re-checked, re-ripped.... and repinned...... and again.... and again.... There were sections that I must've re-done four or five times.  The human eye is capable of noticing a mis-match of much less than a millimeter - so once I decided that these side seams were going to be matched, dammit, it was a verrrry long afternoon of following through, spitting pins all the way.   


Hokay.  
Am I happy with the result?  Yes. For a pull-on tee, it's a very cute and unusual frock. All out of 1 m of lingerie lining (the base under-dress) and 2 m of a very beefy, textured poly knit. Perhaps not the best fabric choice for this pattern, as those overlapping shingles result in very many layers in the side seams, especially at each shingle's hem. The hems are a simple fold over with an invisible zigzag along each dark stripe.

The best part, though?  He heh.  I got a long sleeved tee out of the remnant.
Using the same pattern, and the scraps, I whipped up this tee before the rest of my family were up this morning - hey, the pattern and all its makings were already on my table!


My son said, "you look verrhy Frrhench!"
My hubs added dryly, "very French Apache".

Zut alors! Vraiement?!

I was really sick to death of being all couture by this point, so after the initial matching of the stripes at the side seams, I let them do their own thing. 


The sleeves are pieced.  Just because. For fun. 

Love the dissonance of the sleeves. The upper left one is cut on the bias. 

I raised the front and back necklines 1/4", and used a dark stripe for the binding.


Really takes me back to my teenage sailing days.  Need - more - stripey - tees. 

Here's a modern version of a French Apache dance.  Warning for the sensitive - it's very, very politically incorrect.  But very good. 


15 October, 2015

Gil Brandao wrap blouse

Since I make lots of sleeveless tops that are loose, lightweight and non-clingy (think silk crepe de chine) this body-hugging wrap blouse pattern - and its intriguing description - was something new for my repertoire.

Gil Brandao wrap blouse
The body-hugging look certainly is a departure from my norm:  my son, upon seeing it said, ooo, fancy!  are you going out somewhere special tonight?  which surprised me to no end.

Its pattern is published in a book of Gil Brandao's designs, and is reviewed, with a scale drawing of the pattern, at Studio Faro's blog as one of their pattern puzzle entries. Thank you, Anita!

I looked at the pattern and thought, if I'm to make a wearable item here, I have to consider how to finish all the edges.  In the original design (I don't want to embed it here without permission) the armscye is a deep and narrow wedge, and I worried that I wouldn't be able to finish it nicely, what with binding in two directions in such a tight corner.  My solution?  I added a side seam to it:


Now each side of the armscye (the armscye is that deep vertical "dart" between the two pieces) had its own seam allowance that continued all the way down the side seam, and finishing said edges became easy.  For a nice clean finish,  I turned all SA's over twice to make a narrow hem along all edges and edgestitched.  There was a lot of basting involved, but the end result was very much worth the time.  As it turned out, at 115 cm, my fabric was too narrow to create the entire garment out of one piece, so the side seam was a necessity.

End of story?  Not quite.  When I tried it on, I realized that this design exposes lots of belly flesh unless worn with/over a very high waisted bottom. I don't wear high waisted bottoms.  This also demanded a solution, so  I added a lower panel to the under-lapping (left) side of the wrap:

A fun little winter project!
 The advantage of this added panel is that, since it's separate from the back lower panel from the waist down, it can be tucked inside slacks or a skirt.  Now both my  modesty and Gil's original concept of a body-hugging front with a little back peplum are preserved:


It's definitely wearable!  It'll look great over a nice flowy black midi skirt, won't it? And, original design notwithstanding, I'd probably tuck that back panel inside as well.

Side seam and armscye bust dart clearly visible.  The side seam's lower end could be raised so the lower panels split at, not below, the waistline
If I was to make it again, I might make some small adjustments, to wit:


1. raise the upper front;  2.  shorten (drop) the upper back, so the "shoulder corner seams" are a little further back; 3. narrow the back a little; 4. raise the waistline aka point of separation of the front and back peplums; and of course, 5. add the front peplum for belly coverage.  But these are minor.

Do you may recognize the fabric? it's a very pretty lightweight silk crepe from, I think, Fabric Mart, bought many years ago.  It responds very well to the stretching punishment of being a wrap!

09 October, 2015

Layered top pattern design - two finished versions

Now that the summer season is well and truly over and our thoughts begin to run to wools and coats, I want to close the loop on this layered top design.  Here's my second, more whimsical version:


This version has a little more front coverage, more back flare,  is a little longer in front, and significantly longer in the back.  You can see these changes below in the main piece of the pattern:


The biggest change is in the back, where I slashed and spread the pattern.  I did this to explore the design possibilities of this funny striped cotton.  To wit:


This revision came to me as I was playing with the yellow versions - I thought, it has an ever so faint whiff of a Balenciaga dress, so let's build on that.  You've all heard of Cristobal Balenciaga, right? The (no longer) living god of couture, active from the 1940's to the early 70's? So many of his designs favoured the high-low look, had a strong back flare, and avoided the natural waistline like the plague:


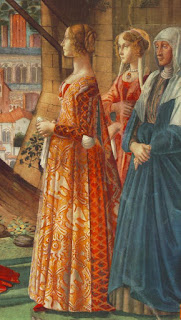
Each time I look at these I think his fundamental inspiration was the Italian Rennaissance:


Not in the details of course, but certainly in the silhouette he evoked.

My first, yellow, finished version, also had a teensy little bit of that:


...and it had a lot less coverage in the front!  Perfect for those who wish to show off that bellybutton piercing, eh? (really, does anyone still do that?  it seems so passé....)

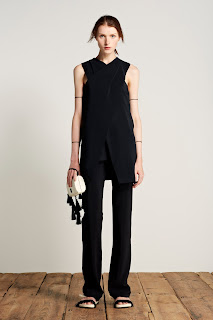
I'm going to leave this subject in highlighting the very many similar versions that strutted the runways last month for Spring 2016:

Look at that:  the bare belly look!
Tunic length with pleated shoulder detail


With a flap pocket

In a boucle or sweater knit

And even in leather, over a maxi.
When I make my wearable version(s), I'm thinking not of leather but a semi-sheer stretch chiffon, to highlight the overlapping and the unusual seaming.  Or a stiffish poly-rayon brocade, to make that back flare stand out and the Renaissance vibe ring out loud.

The last word belongs to Balenciaga after all - here's one of from his very own design house, from a runway show of many, many years ago (I found it a couple of days ago.... go figure: everything old is new again!)

With a  little modesty button at lower CF. 

07 October, 2015

Purple Passion Peplum = a two piece dress

This is the story of a nice little two-piece dress that just happened!


I'd meant to grab a skirt's length of this intriguing shirred cotton-rayon jacquard from EmmaOneSock, but before I got my nerve up high enough to break my fabric fast (ahem!), the last bit of it got sold out from under my mouse click.  Darn, I thought, and, eternal optimist that I am, checked for it on roll ends.  Success!!! well, sort of - the roll end was a two-er: two lengths of a skirt, not one.  Oh hang it, in for a penny, in for a pound, rationalized she... and a two piece dress was born.

The skirt was easy:  

sew the selvedges together, serge the upper raw edge, turn it down, insert 3/4" non-roll elastic, press and stitch a double-turn narrow hem:  done!

The blouse turned out to be a bit more of a process. 

The first version was the result of two main moves:

1. cut off and flip the upper heavy-jacquard yoke so it's colour-reversed with the skirt's bottom.  Not a huge difference from far away, but it seems brighter that way at close view.  
The skirt is exactly like the right half of this pic.  The blouse has the  reversed (at lower left) yoke over the shoulders and the same purple (at upper right) main part.  Clear as mud?
2. remove about half of the shirring from the lower waist area. I'm a shortie, and thus very short waisted.  A six inch tall waistline stretching down to my nether regions would look very strange indeed. 


I also curved down the off shoulder part of the blouse's shoulder seam for a cap-sleeve effect (otherwise the yoke would've stuck out to the sides like a piece of flat cardboard) and, though this isn't visible in the photo below nor on me, curved down slightly the neckline opening both in the front and the back:


Done, I thought, and took some end-of-project photos. 

And here, my dear friends, is where blogging becomes invaluable.  Perhaps not for you, the readers - you tell me! - but emphatically so for the blogger:  if not for the fact that I wanted to show you this me-made easy-peasy no-pattern outfit here, I'd not have photo'ged it, and I'd not have had the opportunity to see it on little ole me in the harsh light of day.  Especially not its back.  

To my eyes, the front looked okay - perhaps a little top-long, but tolerable: 


I mean, really:  on a live person, in motion, in often dubious lighting, seated behind a table perhaps, and, almost guaranteed, not through the eyes of another sewer - yes, acceptable IRL (in real life).  But the back of the blouse, which I'd never have looked at if not for said photos, said screamed to me, I belong on a much bigger woman!!!!  At 30,000 feet!!! In free-fall!!!!


Back to the drawing board....

Stage two saw me undo the lower yoke seam and shorten the below-yoke part of the blouse by 1.5" in the front and 2" in the back, and add two vertical darts in the back, each of which had a 1.5" bite out of the fabric at its (the dart's) widest, just above the shirring.  Here's the result: 


It may look a little uneven, but that's just my "heavy backpack over my raised left shoulder" lousy posture.  In close-up, the darts are even: 

hope think you'll agree that they've brought the back's flapping parachute back down to solid ground.

The changes are subtle - perhaps too subtle for a real-life interlocutor to notice;  after all, people don't usually talk to your back.  Still, they're sufficiently significant to make the difference to me:  the difference between an "almost but not quite wearable closet orphan"  and a "rockin' two-piece LBD LPD"!  I'm SO going to wear this baby:


:)