30 November, 2014

Grey boucle/tweed wardrobe

Today was a beautiful day:  dry and, relatively speaking, warm.  No rain, no snow, temp well above freezing.  Tomorrow, I hear, it'll be quite the contrary.  So I prevailed upon the Hubs to take a few pics of my new grey wardrobe. To wit:

1. Chanel-style jacket, wool bouclé, cotton broadcloth underlining, silk twill lining and trim
2. A-line pleated skirt, wool bouclé, silk organza underlining, bemberg rayon lining
3. Blouse, out of the same silk twill as the jacket's lining and trim
4. Grey bouclé and black ponte top to work with the skirt for a two-piece dress
5. Standard lightweight wool black trousers, made long ago and a beloved wardrobe basic

Jacket:  New Look 6516

My new hair goes very well with this new outfit, doncha think? (...beats being bald....)

With bouclé top and skirt for a very unified look

Methinks the proportions are a bit top heavy. Next time, I'll shorten the jacket by at least 2 inches/5cm!

Unobstructed view
Edge stitching of  the outside  edges of the pleats
 keeps them sharp, while edge stitching of the pleats' inside
prevents them from falling open. 
Front pleats are faced with lining fabric to reduce bulk, otherwise those pleats just wouldn't behave.
 Elsewhere, the fashion fabric is folded up and edgestitched.


With matching silk blouse.  But just look at that chain: the links are so poorly closed that they slip right out of the thread!

Bouclé-ponte top: Go 4001

I went for grey-black-grey-black-grey-black. 

Love this pattern's strong princess lines. And look at the matching sleeve trim!

 Boucle side back with black ponte on either side.

Honey, does this make me look wide in the beam? 


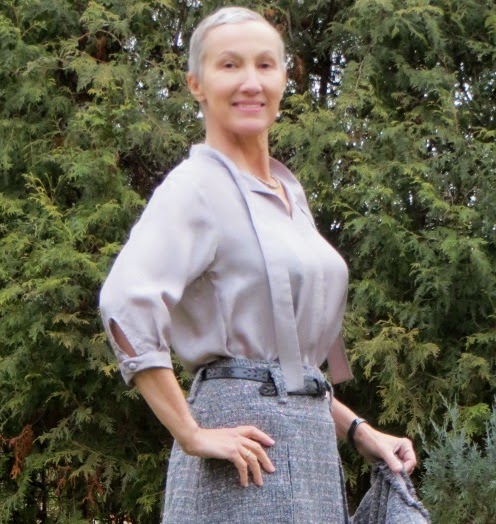
Half-length sleeves with self-covered buttons. 

Love the belt carriers on the skirt's yoke.   Need new, skinny belt.
From a distance the blouse looks a nice pearly grey.  But actually, it's a very fine print in cool pink and black.  I like how the print size reflects the pink loops of the bouclé.


You have to be pretty close to the garments to spot the pattern: 
If you look closely, you'll note that the rows of pink are not evenly spaced,
but at 1/2" and 1" intervals. I had to remember that when cutting out the pockets,
to match them to the underlying fronts. 

The look with trousers: The slacks are from a very old Burda paper pattern.  I've tweaked them to death so they fit me no matter what, and now I don't dare try any other pattern. 


I will, of course, add to this little wardrobe, at the very least a couple more matching tops.  

Da-da-da-dat's all folks!  

25 November, 2014

A little tweed top

I have a small remnant of my grey boucle/tweed.  It's just enough for the front of a top.  There's not enough for the back or sleeves.  Those sections will be made out of a black poly/rayon/spandex knit, a nice ponte.  I had to fall off my Stashbusting wagon (gasp!), and purchase one meter of the ponte to accomplish this.

I've been pondering how to sew up this top.  My initial idea was a top based on the Go 4001 dress, a side princess pattern, similar to the one I made for my brown suit. I made the full dress, too.

However, the boucle remnant is just barely too narrow for the two front pattern pieces.  It's only wide enough for the front if cut out of a single pattern piece, with a side or bottom dart for bust shaping. Arrrgh, right?

What has held me back from using a single front piece is, first, that it would look a bit boring, with limited shaping. More importantly, such a top would play to one of my favourite pet peeves of fashion, and that is what's known as "coffin clothes", i.e., garments that look interesting from the front only but have a dull, non-matching back.  I see dresses like this on the web pages of high end stores all the time:  sewn up out of beautiful front fabrics or with interesting front details, only to disappoint with truly nothing to look at, dull, dull, dull backs.  Not only does this generate an instinctive emotional ugh in me, but it also gets my back up that one is expected to pay through the nose for a supposedly designer garment that looks good only from one vantage point. My top, due to the remnant width limitation, was in danger of becoming just such a coffin item.

Then I thought, why not colour block it?  The boucle is wide enough for a centre front and side back panels. The black knit could make up the sleeves, side fronts and centre back pieces.  That way, the boucle side back pieces would add some interest to the back of the garment.   Colour blocking is also slimming.  Not really of importance, but heck, when fate offers you a little freebie along the way, why not grab it. And the knit sections will allow me to eliminate the CB zipper.

Here's the colour-blocked layout on the two fabrics:
Boucle:  side back and centre front pieces.  
Black ponte:  centre back, side front, and sleeves.  
The Go 4001 dress is sleeveless, with a very lovely boat neckline and slightly cut-in armscye.  I compared its neck, shoulder, and armscye shape to to the Jalie 2805 tee pattern, and adjusted accordingly so the sleeves fit correctly.

Pins in the boucle mark a slight widening of the armscye to match Jalie 2805 and the Jalie sleeve.

The back shoulder is also widened from 3" to 4", but the increase is centered on the existing shoulder in order to prevent gaposis. 


Inside front:  I lined all three boucle panels with grey bemberg lining, and sewed them together in such a way that the raw seam edges  are neatly enclosed between the boucle and the  lining.


Inside back.


Outside front:  the raw edges are caught by a narrow zigzag on the tweed, along the seamline.  Thanks to the texture of the boucle, the zigzag is completely invisible.
Outside back.


This is the stage I reached by this afternoon, when it started to get dark.  But it's finished now:  an easy day's work from layout to hiding that last knotted thread.  If not for those lining pieces, and my wish to hide all the raw seams instead of just serging the lot together, plus some completely superfluous but cute (I think!) additional details, it would have taken no more than half the day to sew up.  

Oh, the skirt, and jacket, and silk blouse are also finished.  Whoever guesses correctly what I'll show in my next post gets a bright gold star!  I have lots of them to go around, btw!  ;)

19 November, 2014

The Ch*anel tweed skirt

With the grey boucle jacket all but finished - except for the hooks and eyes along its front opening - I turned my attention to making a matching skirt that, once completed, will give me a work-worthy little suit.

If you've ever given a little thought to Chanel's overall look and feel you might notice that Karl likes the A-line silhouette.  Just look at these:

 I found all these examples by googling "Chanel skirt".  There are lots of others, many with stratospherically high, lap-dancing-only hems, so I picked out just those that I thought could easily be translateable to real life scenarios.
 ....and in pretty sedate colours, too.
 A little air conditioning between the thighs is very nicely offset here by a giant let's keep my ears warm-and-toasty collar.  The overall silhouette is great, and I like how the thick turned-up cuffs offer a stark contrast to the model's delicate wrists.  She looks like a fragile little shore bird safely coccooned in a cozy warm blanket.
 This one is very fierce. And comfortable at the same time.
Although I'm not crazy about the colour and the armscyes look huge on the model, the skirt shape makes my point very nicely.


I've made my point? Indeed. So you won't be surprised to learn that I decided on an A-line skirt for this outfit. For the pattern, I turned to New Look 6511.  Unfortunately this pattern is no longer in print, but I did see it's on offer on etsy today.


Several years ago I had made the midi version view A of this pattern in an olive coloured ultra-suede. This time, I thought the short pleated skirt - view D - was giving off just the Ch*anel vibe I was looking for. I was particularly encouraged by the fact that it's shown in a boucle or tweed in the picture. Yesssss!

I cut a straight size 12, but upon fitting just the yokes found I had to take at least 5/8" off each side of both front and back. Later, after the skirt panels were attached to the yoke, I took out a big wedge out of the centre of the back yoke.  Interestingly, this is exactly the same alteration I did to the back yoke of my view A version.

I interfaced the yokes with a fusible, and that made them nice and smooth while maximizing their stability.  The skirt panels, however, are quilted to a silk organza underlining. It took a lot of basting at fairly narrow (3-4 cm) intervals, but  I'm getting reconciled to these time consuming tricks, and with good reason:  I had used silk organza underlining in a skirt once before, and very much like how it looks and wears.  A lesson well learned.

Before it got too dark to sew, I completed the outer shell:

 Inside front:  the difference between the interfaced yoke and organza-underlined lower panels is clear.  The front has two wide box pleats.
 Inside back:  there's a big difference between my butt and my waist, so the back yoke needed to be severely narrowed at the top.  The lower back is made of three flaring panels.
Front:  these box pleats make it really really cute.  The edges are basted at the  moment; they'll  be edge-stitched once the skirt is hemmed. The  zipper is set into the left side.  Of course you can't see it:  it's invisible!


Tomorrow morning I'll burrow into my stash for a thin, lightweight grey wool for the hem facing.  A facing seems like the best solution for those box pleats, as the tweed is quite thick and I'm sure would prove very troublesome when folded upon itself so many times.   

11 November, 2014

Making a fringed trim

So.  First, to answer Ann's gentle query of last post, I've been AWOL for most of the year because of the big C.  It's been quite a ride:  a year of various chemo regimens, then high dose (aka "killer" aka "apocalyptic") chemo immediately followed by a bone marrow transplant, and lastly, a month of radiation.  Unexpected detours aside, the treatments are finally over (hah, says the skeptic, for now), and I'm still standing.  So, since it looks like I'll be around to have a bit of fun in the near future at least, I decided to celebrate by - what else?! making myself a new jacket.  Ta-da!

For this one, I used the grey/pink/blue wool boucle I described way back in March 2012 under "Anatomy of a boucle".  It's truly a beautiful fabric, and of course it begged to become a Ch*anel or Little French Jacket.

I decided to use the same pattern, New Look 6516, and technique (quilting an underlining and sewing a regular lining) as I did for my Rainbow Jacket.  I'm promising myself that one day I'll make a LFJ using the classic quilted lining method, but that day hasn't yet come.  To tell the truth, I like a loose lining because it floats free of the fashion fabric, thereby adding a layer of air and thus making a warmer garment.  Especially in wool with a silk lining, for a winter jacket.  Along those lines, I'm rationalizing that a cotton or some other non-wool tweed or boucle, paired with a quilted bemberg rayon lining would be a very fine idea for a summer garment.

To make this one a little different from my previous LFJ's, I opted for a fringed trim.  We-heh-helll. Talk about a make-work project.  Separating these curly, tightly interwoven fibres was a major PITA. I thought I'd die of tedium and boredom.... but as the Chinese proverb says, a journey of a thousand leagues begins with one step.  Hence the trim-making process:

At the top we have a me-made ribbon:  it's made from a silk twill that's also destined to become the jacket's lining plus a matching top.  The ribbon strips were cut on the bias, sewed wrong sides together, and pressed so the seam is concealed underneath.  Since the ribbon will be sewn down on top of the fringe (as shown above), I saved myself the effort of turning all those tiny narrow tubes inside out.  The top two fringes are already trimmed; the third is not. The fourth strip from the top is in the process of being fringed.  Each of these fringe strips is made up of two bias strips of the fashion fabric, laid on top of each other and sewed together down the middle, as in the second strip from the bottom. The bottom strip is just a singleton - a spare.  I used the blunt end of the largest darning needle I could find in my needle collection to separate those pesky curly fibres:  YAWN!

Here's a closeup of the fringes in progress:


...and here's an even closer closeup that shows how the silk ribbon looks just lying on top of the fringe.  


To be honest, I'd have used a manufactured trim if I'd been able to find one in the correct (narrow) size and matching pink colour.  But these criteria couldn't be met in my little town - so the me-made ribbon is the only solution, otherwise the jacket would've become a UFO till my next trip to NY NY. I'm just not willing to wait that long. 

The jacket's coming along.  The outer body, with its fine cotton broadcloth underlining quilted on, is already constructed, and the pockets - one big and one little on each side - are already attached.  Sleeve trim is only basted on at the moment:


I made some effort to match the pink stripes on the pockets to those on the jacket itself.  And, despite the mind-numbing tedium of making them, I really, really like these fuzzy grey caterpillars. They're whimsical and feminine.  I'll also be adding fringe around the neckline and hem, and down both sides of the front opening.

02 November, 2014

Baby girl got married

Although weddings of one's children are - understandably - rare highlights of life, rest assured I wouldn't be blogging about this one if it wasn't sewing related.  In the event, it was not so much a wedding but a process - never have I been so intimately involved, for months and months and months, in someone else's big day, and, having only this one daughter, I never expect to be so again. In comparison with hers, even my own weddings - yes, more than one ;) - were small and simple  affairs both in planning and execution. And though the leadup to this one consumed months of activity, it was time well spent, a real mom-daughter treat. I wouldn't have had it any other way.

What I found most interesting is hearing right from the get go what the young couple didn't want:  overwhelming formality and conventionality.  She was adamant that as a modern woman she didn't want  to look like a cupcake.  So, emphatically, no white gown, no veil, and no passel of bridesmaids in matching cocktail dresses hanging on the arms of cookie-cutter groomsmen.  She wanted a country themed wedding, with a colourful floral skirt, a simple non-matching top, and flowers in her hair.

Finding fabric for the skirt was hilariously difficult, time consuming, and ultimately unsatisfying.  We hit our local Fabricland of course, and several times at that.  I then pointed her at the various online fabric stores, and kept sending her links to various floral prints in silk, cotton, poly.... Eventually she bought a length of floral fabric on e*bay, and then had to return it because the actual colour tone was not at all like its photograph: dingy beige background instead of a clean cream coloured one.  "I am beginning to understand why women choose white for their wedding", she sighed one day after this little fiasco, "it removes the stress of having to find something you'll actually like!" Um, yes, that's definitely one way to look at it.  And this from a child of mine who's nothing if not decisive.  

Ultimately, grandma came to the rescue with an offer of a heavy embroidered gold silk she'd purchased a very long time ago on a trip to India. Mom - that's me! - made the skirt, of course: fitted to the hip and flaring nicely below, very simple out of four identical panels, a waistband with elastic in the back to snug it up to the waist, invisible CB zipper, lined with cream bemberg with lace along the hem.  I offered to make her a matching shrug out of the remnant, but my little bride-to-be declined the offer.

We also had a couple of marathon weekends of hemming lots and lots of white tablecloths and gazillions of floral napkins:


On her own time, she made hundreds of yards of lace triangle bunting that  decorated the ceremony venue:


And then, I made myself a little silk dress. The silk, a green-tan paisley charmeuse-chiffon with metallic gold threads, came out of my stash.  The pattern was Burda magazine 12-2008-110 with a pleated front neckline, that I'd used once before.  This time, I adapted it slightly for this very lightweight fabric by widening the skirt hem by about 50 cm to make it flowy; in the original pattern, the skirt is a straight pencil one.  I also had enough fabric to make a very large matching headscarf that I wore in lieu of hair under a large, wide-brimmed hat.  I was going to line it - honest! then, just as I was about to cut into the lining fabric, got a whisper of a memory niggle that I might just have a full length slip that might do instead.  Righty-oh!  Indeed, I had made a white silk charmeuse slip so long ago it was all but forgotten.  So, I wore that under the dress, and didn't have to line it at all. 

I don't have a full length shot - yet...
All in all, it was a beautiful, memorable weekend, and a great time was had by all.