Showing posts with label wool. Show all posts

18 March, 2016

Black and white and, um, pink??? yellow??? reddish??? all over

As I was starting the above title, I was naturally reminded of an old Communist era joke, what's black and white and red all over?  Pravda (the official  newspaper of the Soviet juggernaut).  And that of course brought to mind the quip that there is no news in Izvestiya and no truth in Pravda.  Tee hee.  Shows my age if nothing else.  But I digress....

Velvet trousers and lace top, accessorized with silk scarf and bass flute.
Photo by the lovely Kyoko of CorgiMark Photography 

This has been an eventful couple of months.  After an absence of two and a half years, I've returned to work, so my available sewing time and after hours stamina have both taken a huge hit.  Guess why I haven't had time to post?

Since I have to be reasonably presentable at work, I suddenly began to feel most keenly the lack of clothing that actually fits the me that I am today, 25 lbs less than a year ago (and that's after regaining quite a bit).   It's shocking how awful one looks in trousers that used to fit but now sag off  jutting hipbones and flap around skinny thighs.  Never mind all my lovely jackets that are several sizes too large - one wants to weep.  But hehey, I am svelte with a vengeance.

So I decided that this sorry situation needed to be rectified in a hurry.  Out came my Jalie trousers pattern 2908, redrafted down from my previous V to a crazy small P, and a couple of trouser-weight black wools from stash.  One, a very nice somewhat beefy twill with a little stretch actually started out grey, but such an ugly utilitarian grey that I promptly threw it into a pot with some Jacquard acid dye and turned it black, the best colour of all.  Grey, btw, is the hardest colour of all - it's never absolutely neutral, there's always some colour cast on it or another - purple, green, blue, impossible!   Add to those two a beautiful stretch poly velvet on sale at my local store, and in quick order I had three pairs of black slacks, two for work, one for my musical evenings, from the same pattern.  

Before sewing these three I made an executive decision:  no front fly on any of them, thank you.  I put a center back invisible zipper in the two work-worthy wools, and made the velvet slacks on an elastic waistband.  You can imagine how very much this simplified construction, can't you?  All feel great in wearing, and I love their smooth feminine fronts.

Photo by the lovely Kyoko of CorgiMark Photography 

The lacy top is based on the Jalie tee pattern 2805.  It's hard to see the neckline in the above photo, but I basically cut it a teeny bit wider than the pattern and then just turned the raw edge under and stitched it down with a zig zag;  I didn't want the headache of using self fabric binding (very uneven, being a stretch lace) nor a heavy binding overwhelming the lightness of the fabric.

So, an easy black and white look that can - and does - take me anywhere.

As a little teaser of what's coming, I'm working on another fun little Jalie zip jacket, pattern 2795 (zip front jacket and hoodie), out of a very funky wool knit from Emma One Sock.  I made some changes to the pattern:  basically, since I wanted to preserve the design of the knit to the utmost, I combined the centre and side pattern pieces of both front and back.  Today, I spent the afternoon prepping two front zip pockets:  first I created two narrow rectangles using silk organza, then hand stitched the zippers and trim into them.  This fabric has beautiful selvage, which I used to its utmost along the CF next to the zipper, and as trim for the pockets.  Here's what the lower fronts will look like:


Cute, right?  Before putting in the lower sleeve/side seams, I'm also going to add hidden zip pockets to the insides of these fronts.  I made one of these inner pockets - yes, just one, on the left - in the last version of this pattern I made, and  it's been invaluable.  Money, passport - close to my heart and utterly invisible and inaccessible.  Every easy wear jacket you intent to travel with needs one of those.

Working away!
:)

14 February, 2015

Black matelasse skirt suit: it's the bomb!

Back to regular programming!  Whew - those itty bitty little booties really took me out of my comfort zone.


My black wool matelasse (wool-nylon blend from Mood), outfit is done, done, and done.  You already saw the blouse I made to go with it. The fabric is super interesting - not nearly as wooly as a wool bouclé, but not smooth like a rayon-poly or cotton matelasse or jacquard. It's a solid black, but the shiny parts reflect light, making them appear greyer in photos, which creates tons of texture. It looks flocked, but isn't:  that texture is created by thick wooly threads woven right in.


I chose Vogue 7975, as  I'd just "revised" my red bouclé  Chanel jacket, so the pattern was at hand.  I'd used it twice before, for the red Chanel, and also my brown-shot-with-blue-and-gold cashmere one.  This time, I was determined to see if I could finally and once for all  make it my own, turn it into a TNT straight out of the envelope.  

Hah!  Does the phrase "hoist by her own petard" (see bottom of post for the ultimate example) say anything to you?  Influenced by a friend (yes I'm looking at YOU, you know who you are!!!), I decided to make a petite alteration above the bust. It's a salutary tale of two different bodies: for her, a perfect move. For me, not so great. What it did was make the armscye tight, and I had to enlarge it back to its original size.  I'm slowly coming to the realization that the correct petite alteration for me - I do need it, since I'm a shortie - is just below the armscye, across the back to the side seam and tapering to nothing at the bust point.  N-e-e-e-e-xt time.....

Successful alterations, anyone?  I wanted a working and visible sleeve vent, so split the upper sleeve in half.  I also wondered about Claire Shaeffer's new Chanel jacket variation, V8804, in which she places the front upper sleeve on a slight bias.  So I did that too: 


I don't think that made any functional difference to the sleeve, but then again, it did no harm either. In a typical even patterned or tweedy fabric it would offer a nice bias textural variation, but in this fabric it was invisible. 

To modernize the jacket a tad and distance myself from the suspicion that I used home dec fabric (quel horreur!), I used leather-look snaps on the sleeve vents plus one at CF waistline:  

Look Ma, no buttonholes!  But quite a bit of laborious hand sewing instead.... 


The skirt is the double-vented, princess seamed V7937 (yes, again).
A good black skirt is a perfect basic, wearable with anything and everything.

One more thing?  Did you notice the collar on my jacket?  But.... V7975 doesn't have one.  Right.  The collar's a bit of an afterthought.  Originally, the jacket was meant to be collarless, with Chanel-like trim.  Midway through construction I decided the fabric pattern wouldn't lend itself to trim, being already very busy. So, I grabbed the collar from my fave Chanel-like pattern, New Look 6516.  And added self fabric front facings instead of lining to the edge.  Done!

All told, 2.5 yards of fabric, 3 yards of silk charmeuse (jacket lining and matching blouse), 0.75 m of black rayon lining for the skirt, all from the stash. For a change and a softer silhouette, I omitted shoulder pads this time.

And here, as promised, is the ultimate of being hoist by your own petard, the final few seconds of Dr. Strangelove (Or How I Learned to Love The Bomb), with the voice of the incomparable Dame Vera Lynn:


This clip gives you the whole "Kong Rides the Bomb" final segment of the movie, with a very young James "The Amazing Voice" Earl Jones at the controls, instantly recognizable once he speaks. 

12 February, 2015

Revisions 1: red bouclé jacket

The last few times I tried to wear my red bouclé Chanel jacket, I had to abandon the inclination.  I shrunk a little in the last few years, and was simply swimming in it.

So recently I took the time to "revise" it.  I took off the trim, removed the front zip, opened the lining, and then took it in - a lot.  The key alteration was taking in the upper shoulder princess lines above the bust point.  The pattern is drafted for a bust whose fullness seems to begin right at the shoulder - I kid you not. My body has a definite hollow between the clavicle and the bust, so without alterations there was quite a lot of pooching of fabric in that area.  I was happy to wrestle that issue into submission and transfer the change - once and for all - onto the pattern pieces.  I also removed a lot from the waist at each of the seams - front, side, and back, taking in the sides all the way to the hip.

Then I put it all back together.


For comparison, here's a collage of the first look, with the original hooks, before I replaced them with a zip:


Driven by my desire for change, I removed all the armscye trim and moved the secondary little pockets to their conventional Chanel locations.  Without the trim, the shoulder line suddenly seems much wider, doesn't it?

The nice thing about this revision?  not only do I have a jacket that fits me better, but the zipper tape is correctly concealed beneath the lining.  Shames me to admit it, but I was too lazy to open the lining when I replaced the hooks with zipper in the first place.  Much happier now.

10 December, 2014

Ziggi lace overlay jacket, part 1

I found a lace overlay fabric at our local store over a year ago.  It's a wool-rayon boiled knit in winter white, with black cotton-poly lace bonded to its face.  The bond is pretty good, though I could pull the two layers apart with a little effort.  Still, not wishing to damage the bond, I decided to omit any pre-treating, though I did spray each piece liberally with water during pressing.

Even when I first got this fabric it was destined to become a moto aka biker jacket.  I love the incongruous juxtaposition of classic biker tough with the femininity of lace.  And, again, as with the lace dresses I discussed previously, there are many versions out there, as lace biker jacket shows. Some are sheer, others coloured... while black lace trench coat and black lace overlay jacket give some more variations on the theme.

But then I got sidetracked, and drifted into activities other than for-me sewing.

Fast forward 12 months.... time to find a pattern. Pattern Review is a great resource for that.  It gave me sixteen hits for a "biker jacket" search. Three of those are Burda 12-2009-111 and eleven are the Style Arc Ziggi.  These are really fantastic creations, in a wide variety of fabrics, I am wowed by the leather versions.  And the reviews are so informative!  I found Jrhee's review (if you're not a signed-in member, you  may not be able to see it) particularly useful, as she includes some thoughts on shaping and a very on point comparison with a gorgeous Montana biker pattern from Vogue (V2973).

I went with the Ziggi. Based on others' comments on ease, I checked the bust and hip dimensions of size 8, and muslined that.  Apart from some diagonal drag lines due to extra fabric along the sides, which I got rid of via pinching out the under-arm excess, it seemed to fit very well. But, you  know, Jrhee's comment that the jacket is a little boxy definitely resonated.  It is.  It has all those vertical lines and very little waist shaping.  So I thought, why not add a little pizzazz to this already great pattern, and REALLY make it my own?

Here's what I did:
Enlarged the collar by 2 cm  along its outer edge
Raised the peplum waistline by 2 cm
Gave the main front and back vertical seam (aka princess) lines more of a diagonal angle by shifting them 2 cm to the side at the top and 1 cm towards the centre at the bottom (at the back, the bottom is the peplum waistline).  This also widened the front lapels, of course.
Gave the peplum more of a flare by widening it 1 cm each side at the bottom.
Narrowed each side of the back sleeve seam (the one with the zipper) by 2 cm at the hem, tapering to zero at 20 cm above the hem.

Here's the first test fitting with the fashion fabric and gold trim along the main seam lines:

I do like the new shape of the back seams and the peplum.

The front seems a tad too big.  
And I'm not crazy about the trim on the secondary (princess) seam lines.


The above pic shows that there's more fabric in the upper back than there ought to be. Just look at the gap above the shoulder!  I see that now, but it wasn't apparent in the muslin.  So, in the next version - if there ever is one - I'll reduce the upper back length by 1.5 cm.  This version got shoulder pads.

Also, the photos above are a good demo that emphasizing every seam with trim is not always a good idea.....  


 ...and a test removal of the trim showed how much better the front and sides look when that seam is allowed to blend into the fabric. 


But the front still felt a bit too big and shapeless, so  I pinched out a little on the upper princess seams for a better fit over the bust. And then I took in the side seams about 2 cm each side.  In retrospect, with all those reductions, perhaps I ought to have started with a size 6?

04 December, 2014

Inspiration retrospective #1

This is just to close the loop on my previously published grey wardrobe.

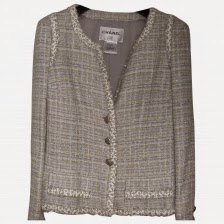
To reiterate, my latest jacket was based on New Look 6516.  It looks like the classic French Cardigan Jacket aka FCJ but was constructed using a not-quite-the-oft-promoted-classic-Chanel method:  the quilting attached the fashion fabric to an underlining, while the lining was inserted using the classic "bagged lining" technique.  However...  I took some time to examine the ins and outs of a large number of genuine Chanel cardigan jackets, and discovered that quite a few of them have a standard rather than the quilted lining. So "quilted lining" isn't necessarily the defining characteristic of all Chanel cardigan jackets.  Surprised?

How is mine one different from my previous FCJ's?  Well, let's just say it's furry with a fringe on top. For the allusion and the treat of a young Hugh Jackman in his early musical theatre days, see below:


Indeed, my jacket is fringed, and fringed, and then fringed some more.  After fringing the front, neckline, and all hems, I went back and made some more fringe for the upper armscye:  call me a masochist.  But, this little decorative conceit is often observed in true Chanel jackets, as in here:


and here:


and here:


And the theme of armscye decoration is also applied to merely braided trim, as in here:


here:


and here:


BTW, all photos come from my internet's image search engine.  I've no doubt you can find more examples if you beat the bushes of the internet for a bit.

In closing, here's a little forward looking inspiration from the incomparable Maison de Couture of which we speak:


Now THAT's some Tyrolean bling!


23 January, 2014

Rainbow jacket: finished!

Declaring a long project completed is a very satisfying moment.

 
I see a slight imperfection in the way the chain lays on the right pocket.  A couple of stitches ought to fix that.


Below is a close-up showing details of the trim: the yarns I threaded through the chain are quite varied. There were at least four different ones in each. I tried to match the predominant surrounding colours.  Now that I see them all together, the pocket trim seems a bit too blue to me. There are blue, green, and navy threads in there, yet the photo makes it appear very monochromatic.  I know it's all a matter of personal taste, yet a purple thread might improve matters and bring it closer to the sleeve trim.


And  on the live "dummy"; as my photographer remarked, the quality of the photos is limited by the subject matter :(


The pic above shows all that's wrong with hooks:  the jacket doesn't ever really close or stay closed.  I'm not crazy about hook closures.  I'll move those hooks inward and maybe that'll suppress the center front gaposis.


In my previous post, BeccaA asked why I included structured jacket techniques (chest shield, sleeve heads and shoulder pads) in a cardigan style jacket.  Hmmm.  First, I wanted to do the Chanel style quilting to an underlining to begin with.  The fact that I had no room for 1" seam allowances aided in that decision:  the classic cardigan method simply wasn't feasible here. Then, when the sleeve issues arose, I knew that sleeve heads would be necessary, so that dictated the other "structured" touches. And I like a structured jacket.  My red version, which has no shoulder pads or chest shield, feels slouchy and (perhaps because it's a little on the big side) sloppy.   But there's one more thing:  a question of self confidence.  I just wasn't sure that I'd have the patience to do all that piecemeal hand-sewing of the lining, nor that I could make it look good enough.  Really.  As it turned out, this jacket took a lot of hand work, so I now suspect I probably could manage to produce one using only the classic cardigan jacket method and see it through to the end.  

With sewing, there's always a next time! :))


05 March, 2010

My NY fabric haul

Sharing one's fabric addiction acquisitions is just the ticket when one is away from the sewing machine on an impromptu vacation business in Florida.


The V7975 jacket was so-so close to being finished before I had to fly off, what with bagging etc all done... so close and yet so far. Yeah, I'm an Olympics groupie. Especially the winter O's - I love winter, hey sue me. Above is a shot of the dark brown silk jacquard I chose for the outfit's lining. I also had a very nice dark blue jacquard, but it was just a bit too in-your-face contrasty with the FF - so low key brown it is, in keeping with the overall "low key classic" idea I've been holding onto in making this outfit. The already-completed top is lined with the same stuff, as is the skirt.

My silk jacquards are not from NY - I got them last year during FFC's silk blowout. I adore silk jacquard - the weaves that create the pattern also add body and make the fabrics totally wrinkle-resistant. And to think they cost less than bemberg lining!

On to NY Fashion District:

I found this very soft pinkish-red gabardine in the same menswear store where I got the brown/blue cashmere currently in progress.


My favourite store in NY Fashion district? It has to be NY Elegant Fabrics.


What I did NOT get at NY E ?

1: wool sateen. I fell in love with their selection of this amazing fabric, but couldn't figure out how I could use it - so decided to wait "till next time". Gentle Reader, advise me on how to use wool sateen, please!

Other stuff I did NOT get at NY Elegant?

2: linen knit - why? it was black, coarse, and felt scratchy. I was tempted but my experience is that black will cook you in summer no matter how nice the fabric. Even though I expect the fabric would've softened in the wash.

3: Missoni knit - why? the colourway was "everything but the kitchen sink", and it was strictly viscose. I'd rather work with a limited palette, and wool.

Moving on to other stores:

Kashi persuaded me to adopt a few lengths of silk, including a couple of new arrivals. He laughs that the stuff sells itself, and he's right. The solid brown is a silk jersey, and the rest "just" twills. Beautiful, dreamy twills.


At Mood Fabrics, I sought out this amazing heathered silver&blue linen jersey:


It was fine, it was soft, it'll make the greatest top for summer wear.

Last (BNL), I got this beautiful cream-brown-black wool tweed at Mood - it's my next-to-do spring outfit.