Showing posts with label boucle. Show all posts

04 December, 2014

Inspiration retrospective #1

This is just to close the loop on my previously published grey wardrobe.

To reiterate, my latest jacket was based on New Look 6516.  It looks like the classic French Cardigan Jacket aka FCJ but was constructed using a not-quite-the-oft-promoted-classic-Chanel method:  the quilting attached the fashion fabric to an underlining, while the lining was inserted using the classic "bagged lining" technique.  However...  I took some time to examine the ins and outs of a large number of genuine Chanel cardigan jackets, and discovered that quite a few of them have a standard rather than the quilted lining. So "quilted lining" isn't necessarily the defining characteristic of all Chanel cardigan jackets.  Surprised?

How is mine one different from my previous FCJ's?  Well, let's just say it's furry with a fringe on top. For the allusion and the treat of a young Hugh Jackman in his early musical theatre days, see below:


Indeed, my jacket is fringed, and fringed, and then fringed some more.  After fringing the front, neckline, and all hems, I went back and made some more fringe for the upper armscye:  call me a masochist.  But, this little decorative conceit is often observed in true Chanel jackets, as in here:


and here:


and here:


And the theme of armscye decoration is also applied to merely braided trim, as in here:


here:


and here:


BTW, all photos come from my internet's image search engine.  I've no doubt you can find more examples if you beat the bushes of the internet for a bit.

In closing, here's a little forward looking inspiration from the incomparable Maison de Couture of which we speak:


Now THAT's some Tyrolean bling!


25 November, 2014

A little tweed top

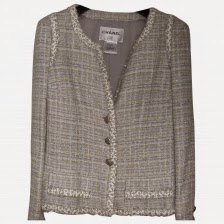
I have a small remnant of my grey boucle/tweed.  It's just enough for the front of a top.  There's not enough for the back or sleeves.  Those sections will be made out of a black poly/rayon/spandex knit, a nice ponte.  I had to fall off my Stashbusting wagon (gasp!), and purchase one meter of the ponte to accomplish this.

I've been pondering how to sew up this top.  My initial idea was a top based on the Go 4001 dress, a side princess pattern, similar to the one I made for my brown suit. I made the full dress, too.

However, the boucle remnant is just barely too narrow for the two front pattern pieces.  It's only wide enough for the front if cut out of a single pattern piece, with a side or bottom dart for bust shaping. Arrrgh, right?

What has held me back from using a single front piece is, first, that it would look a bit boring, with limited shaping. More importantly, such a top would play to one of my favourite pet peeves of fashion, and that is what's known as "coffin clothes", i.e., garments that look interesting from the front only but have a dull, non-matching back.  I see dresses like this on the web pages of high end stores all the time:  sewn up out of beautiful front fabrics or with interesting front details, only to disappoint with truly nothing to look at, dull, dull, dull backs.  Not only does this generate an instinctive emotional ugh in me, but it also gets my back up that one is expected to pay through the nose for a supposedly designer garment that looks good only from one vantage point. My top, due to the remnant width limitation, was in danger of becoming just such a coffin item.

Then I thought, why not colour block it?  The boucle is wide enough for a centre front and side back panels. The black knit could make up the sleeves, side fronts and centre back pieces.  That way, the boucle side back pieces would add some interest to the back of the garment.   Colour blocking is also slimming.  Not really of importance, but heck, when fate offers you a little freebie along the way, why not grab it. And the knit sections will allow me to eliminate the CB zipper.

Here's the colour-blocked layout on the two fabrics:
Boucle:  side back and centre front pieces.  
Black ponte:  centre back, side front, and sleeves.  
The Go 4001 dress is sleeveless, with a very lovely boat neckline and slightly cut-in armscye.  I compared its neck, shoulder, and armscye shape to to the Jalie 2805 tee pattern, and adjusted accordingly so the sleeves fit correctly.

Pins in the boucle mark a slight widening of the armscye to match Jalie 2805 and the Jalie sleeve.

The back shoulder is also widened from 3" to 4", but the increase is centered on the existing shoulder in order to prevent gaposis. 


Inside front:  I lined all three boucle panels with grey bemberg lining, and sewed them together in such a way that the raw seam edges  are neatly enclosed between the boucle and the  lining.


Inside back.


Outside front:  the raw edges are caught by a narrow zigzag on the tweed, along the seamline.  Thanks to the texture of the boucle, the zigzag is completely invisible.
Outside back.


This is the stage I reached by this afternoon, when it started to get dark.  But it's finished now:  an easy day's work from layout to hiding that last knotted thread.  If not for those lining pieces, and my wish to hide all the raw seams instead of just serging the lot together, plus some completely superfluous but cute (I think!) additional details, it would have taken no more than half the day to sew up.  

Oh, the skirt, and jacket, and silk blouse are also finished.  Whoever guesses correctly what I'll show in my next post gets a bright gold star!  I have lots of them to go around, btw!  ;)

19 November, 2014

The Ch*anel tweed skirt

With the grey boucle jacket all but finished - except for the hooks and eyes along its front opening - I turned my attention to making a matching skirt that, once completed, will give me a work-worthy little suit.

If you've ever given a little thought to Chanel's overall look and feel you might notice that Karl likes the A-line silhouette.  Just look at these:

 I found all these examples by googling "Chanel skirt".  There are lots of others, many with stratospherically high, lap-dancing-only hems, so I picked out just those that I thought could easily be translateable to real life scenarios.
 ....and in pretty sedate colours, too.
 A little air conditioning between the thighs is very nicely offset here by a giant let's keep my ears warm-and-toasty collar.  The overall silhouette is great, and I like how the thick turned-up cuffs offer a stark contrast to the model's delicate wrists.  She looks like a fragile little shore bird safely coccooned in a cozy warm blanket.
 This one is very fierce. And comfortable at the same time.
Although I'm not crazy about the colour and the armscyes look huge on the model, the skirt shape makes my point very nicely.


I've made my point? Indeed. So you won't be surprised to learn that I decided on an A-line skirt for this outfit. For the pattern, I turned to New Look 6511.  Unfortunately this pattern is no longer in print, but I did see it's on offer on etsy today.


Several years ago I had made the midi version view A of this pattern in an olive coloured ultra-suede. This time, I thought the short pleated skirt - view D - was giving off just the Ch*anel vibe I was looking for. I was particularly encouraged by the fact that it's shown in a boucle or tweed in the picture. Yesssss!

I cut a straight size 12, but upon fitting just the yokes found I had to take at least 5/8" off each side of both front and back. Later, after the skirt panels were attached to the yoke, I took out a big wedge out of the centre of the back yoke.  Interestingly, this is exactly the same alteration I did to the back yoke of my view A version.

I interfaced the yokes with a fusible, and that made them nice and smooth while maximizing their stability.  The skirt panels, however, are quilted to a silk organza underlining. It took a lot of basting at fairly narrow (3-4 cm) intervals, but  I'm getting reconciled to these time consuming tricks, and with good reason:  I had used silk organza underlining in a skirt once before, and very much like how it looks and wears.  A lesson well learned.

Before it got too dark to sew, I completed the outer shell:

 Inside front:  the difference between the interfaced yoke and organza-underlined lower panels is clear.  The front has two wide box pleats.
 Inside back:  there's a big difference between my butt and my waist, so the back yoke needed to be severely narrowed at the top.  The lower back is made of three flaring panels.
Front:  these box pleats make it really really cute.  The edges are basted at the  moment; they'll  be edge-stitched once the skirt is hemmed. The  zipper is set into the left side.  Of course you can't see it:  it's invisible!


Tomorrow morning I'll burrow into my stash for a thin, lightweight grey wool for the hem facing.  A facing seems like the best solution for those box pleats, as the tweed is quite thick and I'm sure would prove very troublesome when folded upon itself so many times.   

18 January, 2014

Rainbow jacket: troubles with sleeves

Building this jacket hasn't been completely smooth sailing.  I spent a good long time on discovering, and then slowly solving, sleeve problems.


First, once sewed together and body tested, the sleeves felt much too stiff and somewhat too tight.  The solution to that was not particularly difficult:  bit by bit, without disassembling the already-made sleeves, I cut away nearly all the quilting.


By the time I finished, the only little bit of blue underlining left on each sleeve was about 5 cm at the cuff, and what had already been caught in the vertical seams.  Those two lines of what remained in the last quilting lines after the rest was pinked away, in the pic above, were also removed.  I also re-stitched the back sleeve seam about 1/4" wider, adding 1/2" to the circumference.  Not necessary, but an uncomfortable garment is one that doesn't get worn, right?

The second sleeve problem was equally unanticipated and rather harder to solve.  Call me naive, but I was under the impression that if the fabric stripe or check of the body piece is matched to the undersleeve, it'll similarly match all the way along the sides and at the sleeve cap. In theory, it should.  In this case, if I'd used the single piece sleeve of NL6516, perhaps it would have.  But I used a sleeve from V7975, and as it turned out it was too shallow.   Here's how:


At left are the back body pieces.  I numbered the armscye blue stripes: there are four of them.  At right are the sleeve pieces, and the blue stripes for the back half of the sleeve's armscye curve are also numbered: there are only three. The fourth stripe needed for a proper fit is missing, and the sleeve cap is too flat and too short to fit in the body correctly.  Oh, I'm sure I could've stretched and strong armed it (pun intended!) into the armscye, but the stripes wouldn't have matched, it wouldn't have looked good, and it very likely wouldn't have felt good in wear.  So how did I solve this problem?  I increased the size of the sleeve cap.


I sewed a strip of fabric two blue stripes high just above stripe number two of the upper sleeve.  I had just enough small pieces of fabric left over to do that.  After that, I really winged it, tacking the sleeve in tiny little increments here and there at important match points, eventually sewing it in by hand with very small stitches, and only after it was all in to my satisfaction (not perfect, mind you, but acceptable!) I machine sewed the lot just inside the hand stitching, for security.  You can just see that horizontal seam in the sleeve above, it's in the purple-magenta stripe.


 After many days, the sleeves are finally in. I have learned my lesson!
I free-handed the cap increase in the lining, and pleated rather than eased the cap into the lining body.  I always pleat out the sleeve cap excess in my linings - it's easy, quick, and comes with no functional penalty.  How about you?


Here's where I diverge from the classic cardigan jacket construction: the lining is a standard one, with an ease pleat in the back and one side seam left open, and it'll be "bagged" into the jacket.